Setting Up a Raspberry Pi for the First Time. You will need a Raspberry Pi 3 Model B, a MicroSD, an HDMI cord, a monitor (with an HDMI input), a keyboard and a mouse.
In this blog post we’re going to discuss the process we went through to set up our Raspberry Pi 3 Model B. For the rest of this post, I’m just going to refer to this as the Raspberry Pi for brevity, but know that this is the specific model we are talking about. We have not used any other Raspberry Pi models so there may be some subtle differences from what we’ve experienced in the CHbeer project.
Before getting started it’s important to note that the Raspberry Pi does not come with everything you need to get it up and running out of the box. When you order a Raspberry Pi online, it comes only with the board itself, which is shown below.
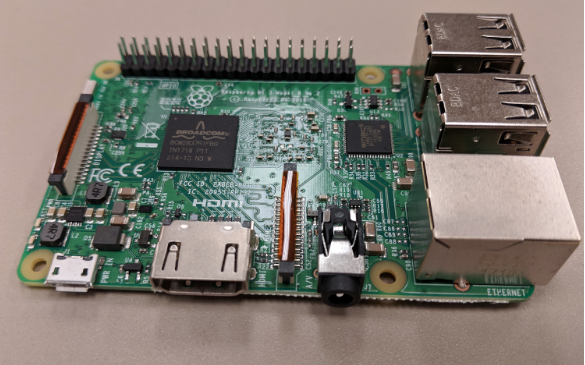 Raspberry Pi 3 Model B
This does not include an operating system or any form of non-volatile memory (memory that lasts even when you turn the Raspberry Pi off). What that means is there is no means of interacting with you board or controlling any of those features we discussed in the last blog post, Working With Raspberry Pi [Part 1].
You will need to buy a MicroSD card so that you can download the Raspberry Pi operating system, Raspbian, which will give you an interface to work through. Raspbian is just like any other operating system, the same way that PC computers typically run Windows and Macs run macOS. Some of you may have used Linux which is another branch operating systems. Actually, Raspbian falls under the Linux distribution, so if you’ve used any other operating systems that operate off of the Linux kernel, you may find some similarities using Raspbian. We may dive into the Linux environment in more detail in a future blog post, but for getting started all you really need to know is that Raspbian is an operating system built for the Raspberry Pi.
The MicroSD card will also provide you with non-volatile memory to save your work, so you should choose a size that will be sufficient to store everything you need for your particular application. For the CHbeer project, we really don’t need a ton of memory because the only thing we need to store on the Raspberry Pi is code to run our monitoring tasks (at the moment). We chose a 32GB microSD card. Make sure that when you buy the MicroSD card, you also have a way to insert it into your computer because this is how you’ll be downloading Raspbian onto it. Most laptops don’t have a MicroSD slot, so you’ll probably need to get an SD card sleeve to fit over it so that you can insert it.
Now, something we found rather frustrating while trying to get our Pi up and running for the first time was that, in addition to a MicroSD card, you also need an HDMI cable, an external monitor that has an HDMI port, a keyboard, and a mouse. You’ll also need a microUSB cable to power the board. Our plan was to use our laptops to interface with the Pi, and we thought it should be easy enough to do so. Unfortunately, this was not the case. To set up a Raspberry Pi using only your laptop, you need to preinstall Raspbian onto the MicroSD card and then set up a local area connection between your laptop and the Raspberry Pi. There is a good tutorial that walks you through this process that I’ve included in a link at the bottom of this blog post. Unfortunately for us, we do all our work on campus, and working through the secured wifi of the university meant we couldn’t connect to the Pi in that way, so we had to go the external monitor route.
The first step in setting up the Pi is downloading Raspbian onto the MicroSD card. You can do this through your laptop or computer by inserting the MicroSD card and then following the steps outlined on the Raspberry Pi webpage.
Once you’ve downloaded Raspbian onto the MicroSD card, you can insert it into the MicroSD slot on the Raspberry Pi. Then, connect the Pi to a keyboard and mouse through the USB ports, and to an external monitor via an HDMI cable. You can now plug the Pi into a power outlet through a MicroUSB charger and it should automatically power on. Images of the Raspberry Pi and the locations of the USB ports, HDMI port, and MicroSD slot are provided below.
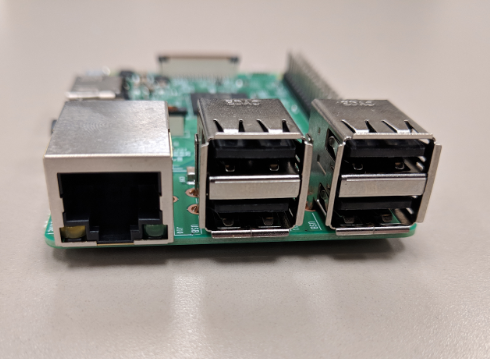 Raspberry Pi 3 Model B - Ethernet port (left) and four USB 2 ports (right)
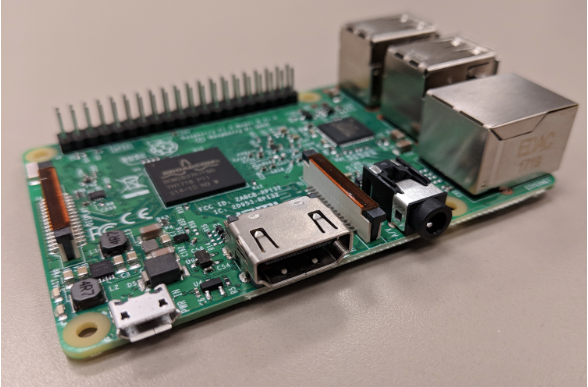 Raspberry Pi 3 Model B - View of MicroUSB port and HDMI Port
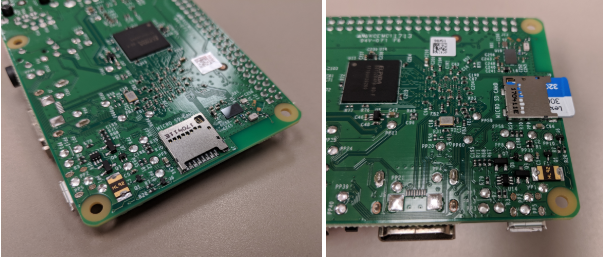 Raspberry Pi 3 Model B - MicroSD card slot on the reverse side of the board (without and with MicroSD card)
The Raspbian desktop should then display on the monitor. There may be some additional installation prompts that appear that you should follow until the process is complete. Once Raspbian is fully installed, you will see something like this:
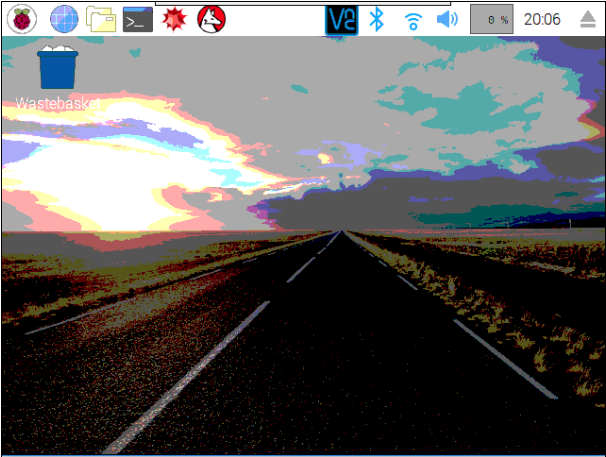 Raspbian Desktop Environment
This is your Raspberry Pi desktop. It has a terminal where you can enter commands, and a directory where you can save documents like scripts that you may want to use for your projects. You can also access the internet through the desktop or connect to other devices via Bluetooth.
That concludes the initial setup! In the next blog post of this series we’ll cover how to access this desktop from your own laptop or computer so that you don’t have to use an external monitor, keyboard and mouse every time you want to work on your Pi.
Helpful Links: