With the Student AIChE/CACHE National Mobile Device APP Competition around the corner, our team has been working hard in exploring different ideas to showcase our creativity in a practical design. As part of our lab course field trips, many of us have visited local breweries to gain a general overview of how the general brewing process works. Keeping this in mind, we decided to try something that none of us have done before: creating an app to automate the brewing of craft beer. To create this app, we first had to be confident in carrying out the brewing process itself. Thus, we are proud to present the CHBE Brewing team, a sub-division of the Chem-E-Car team!
![]() Logo design courtesy of Amanda Penuta.
Logo design courtesy of Amanda Penuta.
We began with browsing the web on what kind of equipment would be required to begin brewing. Without any prior experience in brewing, it was difficult to know whether we really needed that $300 “All-in-One Reactor”. Instead, we chose to drop by some local homebrewing businesses to learn more about the process. We ended up going to Centennial Homebrewing Supplies and speaking with the owner, Brian Janzen. Brian was extremely informative, guiding us through the steps of homebrewing; from choosing the right equipment for beginner brewing, to bottling the brew at the very end. His tutorial can be found here.
 Overview of the extract brewing process that we followed.
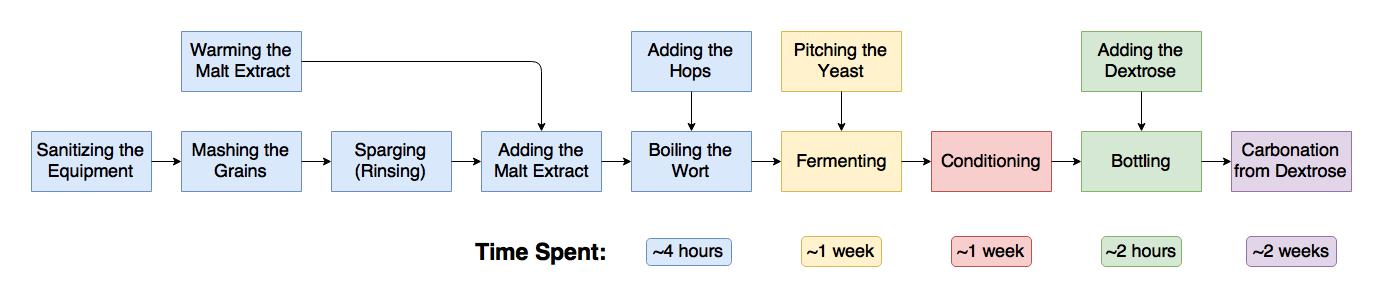
Armed with this new knowledge, we purchased the equipment and got to work. We began with sanitizing all the equipment with Sani-brew (1 tbsp. powder/L of water) cleaning solution. This is to ensure that chance of bacterial growth or contamination is minimized.
The next step is to “mash the grains”. Contrary to what we initially thought, it had nothing to do with physically mashing the grains. This step involved adding 1L of water for each lb of grain that we had (2.5L of water in our case) to a pot and bringing the temperature up to ~145 to 155°F (~63 to 68°C). This mixture was then allowed to steep for about 60 minutes. Due to the uneven heating from the stove we were using, the grains ended up being slightly burnt… but that just adds more flavor to the brew, right? (To be confirmed)
As the grains were steeping, another pot of water was heated up to about 175°F (~79°C). This pot of water was used in the sparging (rinsing) step. This was done by pouring the steeped grains mixture into a colander, and the additional water through the grains into another pot. The liquid that drains through is the base of our wort, while the spent grains were disposed of. The liquid malt extract was added to the wort base and stirred well until the mixture was uniform. This was done before the stove was turned on to prevent the mixture from burning and sticking to the bottom of the pot. The mixture was then brought to a boil. During this boiling time, the primary fermenter was sanitized using the Sani-brew cleaning solution.
Once the wort was boiling, we set a timer for 60 minutes of boiling. Throughout this timeframe, hops were added at different times. For example, the Pacific ESB we were making required the 3 bags of hops to be added in at 0 minutes (beginning of boil), 45 minutes, and 55 minutes of boiling time. Once the boiling time was complete, the wort was then plunged into an ice bath to cool it down. As Vancouver has been experiencing heavy snowfall (by our standards), our ice bath consisted of snow and ice taken from right outside our doorstep. Once the wort reached a temperature of around ~69 to 73°F (~20.5 to 23°C), it was poured into the primary fermenter. The primary fermenter was topped off with water so the total volume of the brew was about 23L, with the temperature being around 21°C for optimal yeast pitching.
Before the yeast was added to the wort, a test was conducted using a hydrometer. This showed the starting gravity of the wort, with the potential final alcohol content (around 6.5% for our brew). The yeast was added to the wort and the primary fermenter was sealed with an airlock (this allows carbon dioxide to escape during fermentation, but nothing to go into the brew). The primary fermenter was then left to sit for about a week.
After a week of fermentation, the brew was transported into the carboy for conditioning and additional fermentation. The brew was siphoned out using a tube with a filter attached to the end to prevent larger solids from going through. Once all the brew was transported to the carboy, it was sealed with another airlock and left to sit for another week.
With a total of two weeks of fermentation, the brew was about ready to bottle. Another test was done with the hydrometer (pictured below) to see if the fermentation was near completion.
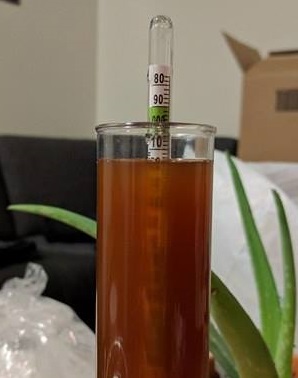
It was recommended that the reading on the hydrometer to be around 1008 to 1010, which indicates that fermentation was near completion. Our reading was roughly 1014, so pretty close.
At this point, the brew was basically flat (not a lot of carbonation). The next step involved adding 3/4 cup of dextrose (priming sugar) into the brew before bottling. Since the bottles are left capped for two more weeks, the priming sugar causes carbonation to occur. The brew was siphoned into two types of bottles that we purchased: 1L EZ-cap bottles and 330mL bottles with crown caps.
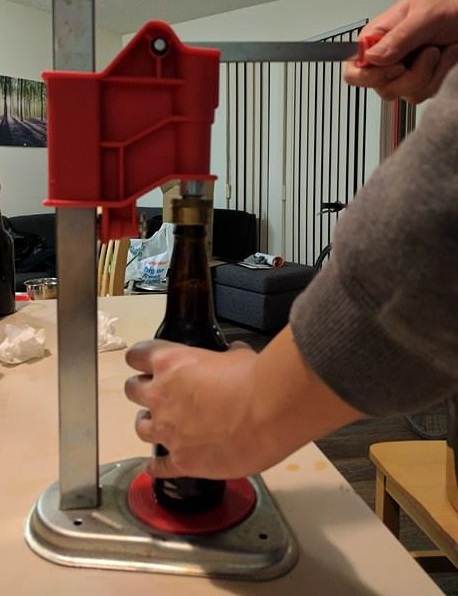
Capping is hard work. (No, it’s not)
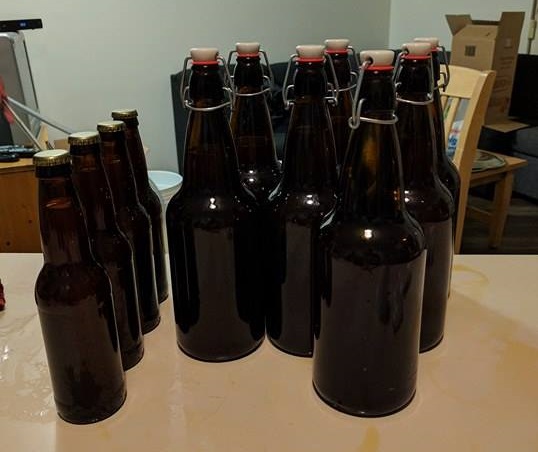
Bottled and ready to drink! (In two weeks)
Now we just need to wait about one more week from this time of posting for the carbonation to finalize. Hopefully we will have great tasting beer to drink!